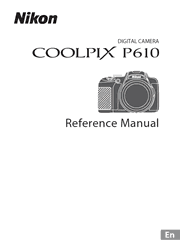
With COOLPIX P610 and its ultra-powerful 60x optical zoom lens, high-end grip-style design, GPS, built-in Wi-Fi and Near Field Communication technology (NFC), plus Full HD video capabilities, a whole new world of shooting and sharing opportunities opens before you. Flip out the swiveling Vari-angle display, hold the COOLPIX P610 overhead and zoom in for an amazing close-up at concerts. Then pull out your compatible smartphone and see the shot you just took with the COOLPIX P610, right in the palm of your hand. Quickly post it to your favorite site and watch the likes roll in. When you’re traveling, built-in GPS records the coordinates of each shot you take. And for those who want creative control, the COOLPIX P610 offers full manual control and advanced shooting modes. (For those who don’t, it offers wonderful point-and-shoot ease.) Start sharing photos and videos that amaze.
Introduction
Read This First
For Your Safety
Notices
Important: Notes About Location Data Functions (GPS/GLONASS)
Wi-Fi (Wireless LAN Network)
Parts of the Camera
The Camera Body
The Monitor
Preparing for Shooting
How to Attach the Camera Strap and Lens Cap
Insert the Battery and Memory Card
Charge the Battery
Opening and Adjusting the Angle of the Monitor
Turn the Camera On and Set the Display Language, Date, and Time
Basic Shooting and Playback Operations
Shooting with Auto Mode
Recording Movies
Play Back Images
Delete Images
Changing the Shooting Mode
Functions That Can Be Set Using the Multi Selector (for Shooting)
Shooting Features
Auto Mode
Scene Mode (Shooting Suited to Scenes)
Special Effects Mode (Applying Effects When Shooting)
P, S, A, M Modes (Setting the Exposure for Shooting)
U (User Settings) Mode
Flash Mode
Self-timer
Smile Timer (Shooting Smiling Faces Automatically)
Focus Mode
Exposure Compensation (Adjusting Brightness)
Functions That Can Be Set with the Fn (Function) Button
Functions That Cannot Be Used Simultaneously When Shooting
Functions That Can Be Set with the MENU (Menu) Button
The Shooting Menu
The Movie Menu
The Playback Menu
The Setup Menu
Using the Wi-Fi (Wireless LAN) Function
Installing the Software on the Smart Device
Reference Section
Hints and Notes About the Scene Mode
Default Settings (Flash, Focus mode, Etc.)
Focusing
The Control Range of the Shutter Speed (P, S, A, M Modes)
Playback Zoom
Thumbnail Playback/Calendar Display
Viewing and Deleting Images Captured Continuously (Sequence)
Editing Images (Still Images)
Recording and Playing Back Movies
Capturing Still Images While Recording Movies
Operations During Movie Playback
Editing Movies
Recording the Location Data on the Image
Recording the Log of Movement Information
Connecting to a Smart Device (Wi-Fi)
Preselecting Images in the Camera That You Want to Transfer to a Smart Device
Connecting the Camera to a TV (Playback on a TV)
Connecting the Camera to a Printer (Direct Print)
Using ViewNX 2 (Transferring Images to a Computer)
The Shooting Menu (The Common Shooting Options)
The Shooting Menu (P, S, A or M Mode)
The Movie Menu
The Playback Menu
The Wi-Fi Options Menu
The Location Data Options Menu
The Setup Menu
Error Messages
File Names
Optional Accessories
Principle Functions of the Controls
Technical Notes and Index
Caring for the Product
Cleaning and Storage
Troubleshooting
Specifications
USER LICENSE AGREEMENT FOR LOCATION NAME DATA
Index
